
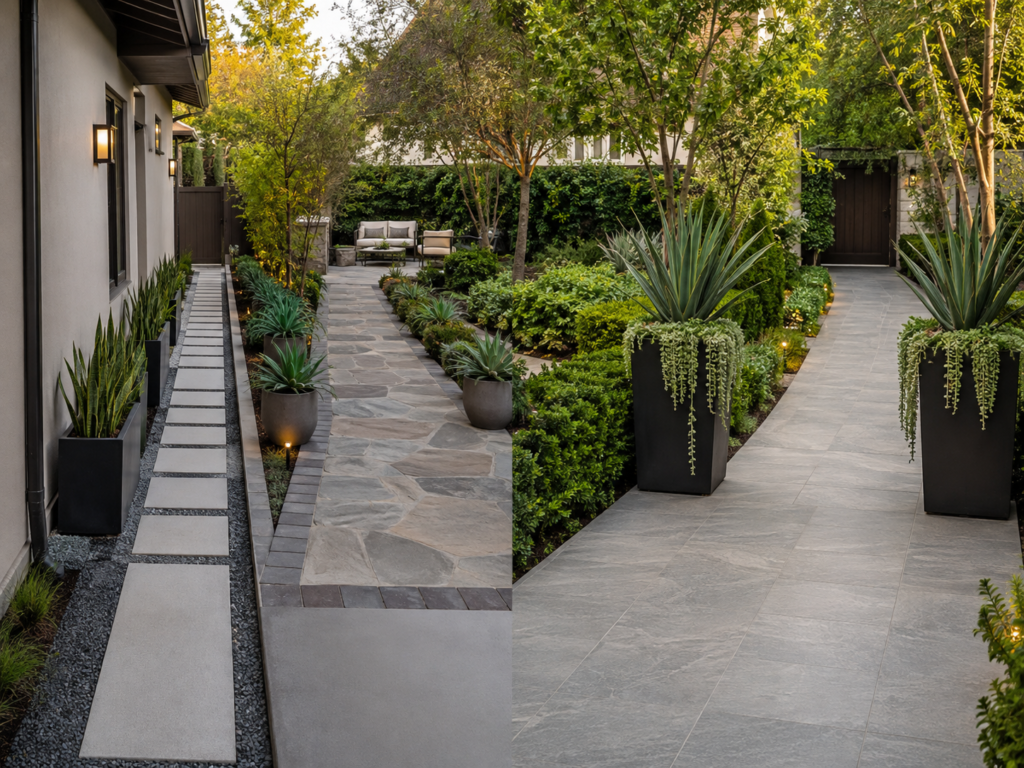
The best backyard pathway planter ideas improve the route without making it harder to use. Slim troughs suit narrow passages, tall square containers define entrances, trellis planters add privacy, raised herb beds make kitchen routes productive, and self-watering planters reduce daily care. Before choosing a design, measure the narrowest point, protect a comfortable walking zone, and include mature foliage in the finished footprint.
Backyard paths connect gates, patios, kitchens, sheds, lawns, bins, and utility areas. Planters must preserve access, drainage, stability, and maintenance after wet growing medium adds weight and foliage expands.
Quick Planter Selector
Choose a planter according to the pathway problem rather than colour alone.
- Use a wall-mounted planter where floor space is extremely limited.
- Use a slim trough beside a long fence or straight wall.
- Use a trellis planter for privacy or vertical planting.
- Use matching containers on a wide formal walkway.
- Use tall square planters to frame an entrance.
- Use one large focal planter at the end of a route.
- Use pale or insulated containers beside hot reflective paving.
- Use foliage-focused planting on shaded paths.
- Use wheeled containers where seasonal movement matters.
- Use a raised herb trough near the kitchen.
- Use a self-watering planter where containers dry quickly.
Before buying, check external width, base width, internal depth, empty weight, estimated filled weight, drainage position, mature foliage spread, weather resistance, and whether the planter may need to move.
How We Evaluated the Ideas
Each idea was assessed as part of a movement corridor rather than as an isolated decorative feature. The evaluation considers the finished planted footprint, including the container, mature foliage, supports, drainage, and maintenance access.
Strong designs preserve clearance, remain stable when wet, direct water safely, suit the surface, and stay easy to maintain. This is an editorial method, not a legal or accessibility assessment.
Use these six factors to compare options:
- Walking clearance
- Stability
- Drainage control
- Maintenance access
- Climate suitability
- Long-term flexibility
Score each factor from one to five. A total of twenty-five to thirty indicates a strong fit. Nineteen to twenty-four is suitable with minor changes. Thirteen to eighteen shows major compromises. Below thirteen means another planter or position is usually wiser.
Pathway Planter Fit Formula
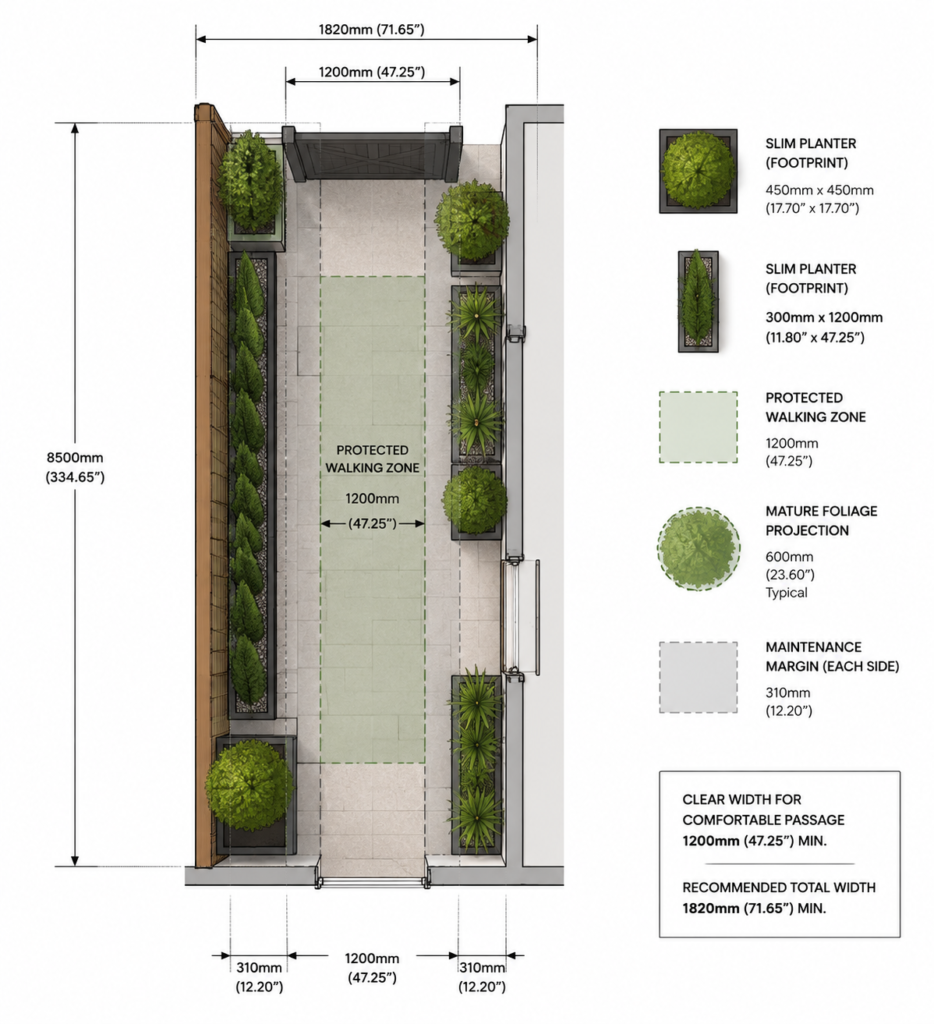
Reserve space beside the path for walking, foliage, maintenance, doors, utilities, and drainage.
Use this formula:
Maximum planter footprint = total corridor width − protected walking width − maintenance and foliage margin
For a corridor measuring 1,500 millimetres, subtract a 915-millimetre protected route and a 150-millimetre maintenance margin. The remaining theoretical planter footprint is 435 millimetres. A 300-millimetre trough may therefore fit, but plant growth still matters.
Use a second formula:
Finished planting footprint = planter width + foliage projection into the route
A 300-millimetre planter with foliage extending 200 millimetres occupies about 500 millimetres. Upright herbs may therefore suit the path better than arching grasses planted in the same container.
As a planning guide, corridors under 1,200 millimetres usually need wall-mounted planting or no floor planter. Routes from 1,200 to 1,500 millimetres may accept one slim planter where clearance permits. Widths from 1,500 to 2,000 millimetres can support one-sided troughs or selected compact pots. Wider routes may allow coordinated planting on both sides.
Measure Your Pathway First
Measure the complete route, especially entrances, corners, gates, doors, steps, drains, downpipes, taps, and storage areas. Use the narrowest measurement, not the average width.
Open every door and gate fully. Include handles, latches, standing space, and the room needed to turn while carrying something. Mark the proposed footprint with cardboard, tape, chalk, or string, then move a bin, mower, wheelbarrow, chair, or shopping bag through the route.
Estimate mature growth at ankle, knee, hand, shoulder, and head level. If movement feels awkward before planting, reduce the container or change its position.
Backyard Pathway Planter Ideas for Narrow Spaces
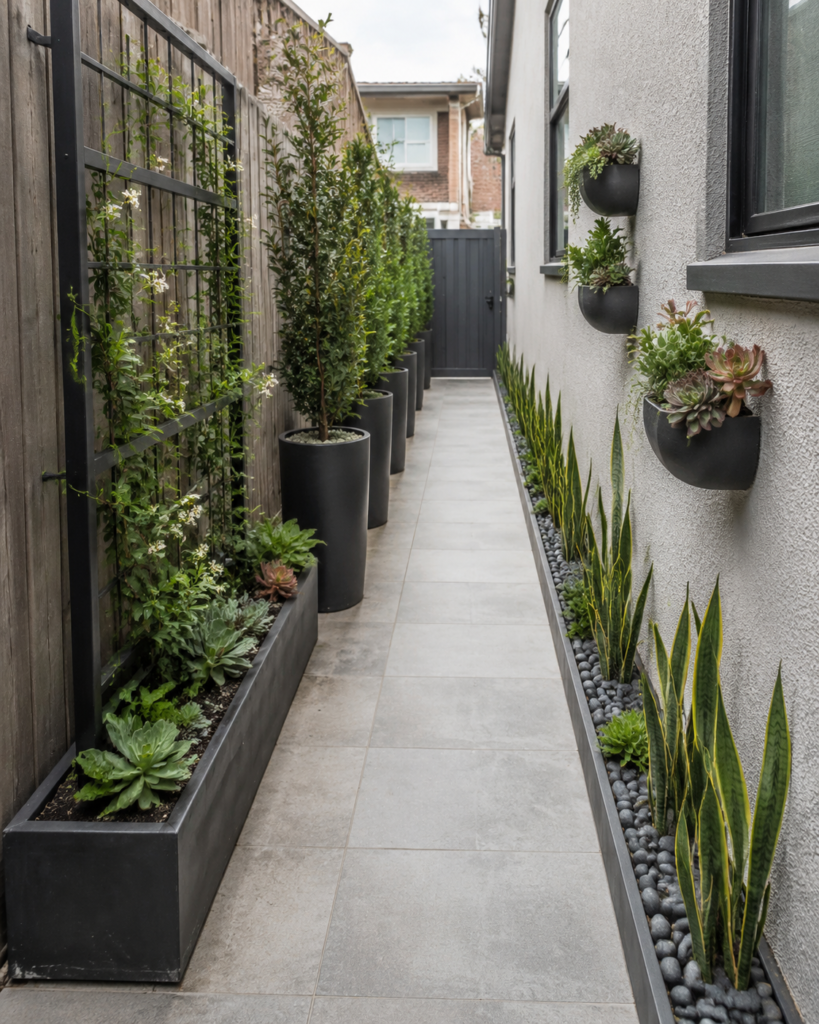
1. Install One Slim Trough
A continuous slim trough creates a clean planted edge beside a fence or wall. It works best on straight routes where planting must remain on one side. Choose upright herbs, compact perennials, or clipped forms instead of trailing plants. Use two or three matching modules when one long container would block drains, taps, doors, or future maintenance.
2. Use Wall-Mounted Planters
Wall-mounted containers preserve the walking surface and suit very narrow side passages. Confirm that the wall or fence can carry the combined weight of the container, wet growing medium, and mature plant. Position each planter within safe watering reach. Keep foliage away from shoulders and control runoff so water does not fall onto steps or collect on paving.
3. Alternate Narrow Pots Along One Side
Alternating compact pots creates rhythm where utilities or doors interrupt a continuous trough. Repeat one material, colour, base shape, or plant form so the display feels intentional. Keep every container on the same side of a busy route. Alternating between both edges can force people to weave around obstacles and makes bins or garden tools harder to move.
4. Add a Vertical Trellis Planter
A trellis planter provides height, greenery, and partial privacy without requiring a deep bed. Choose a broad, stable base because climbing foliage increases wind pressure as it matures. Match the support to the plant’s climbing habit, and prune growth before it projects into the walkway.
Statement Pathway Planter Ideas
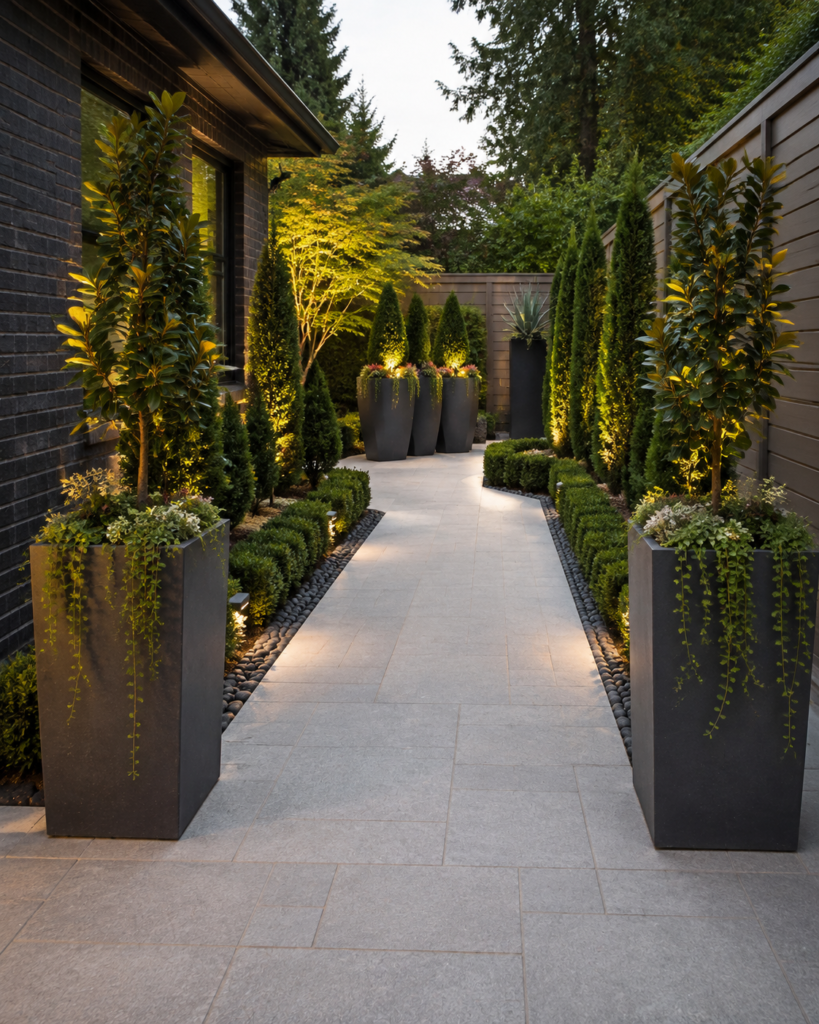
5. Frame the Entrance With Tall Planters
A matching pair of tall square planters can define the start of a pathway. Keep gate handles, lighting, steps, numbers, security equipment, and sightlines visible. Choose broad bases and upright plants. If the entrance feels narrow, move the containers outward rather than sacrificing access. Avoid lightweight tapered pots in exposed gateways where wind can make them unstable.
6. Add a Focal Planter at the Path End
A large focal container creates a destination and softens a blank wall or fence. Use clipped evergreen foliage, a compact shrub, a small container tree, or a seasonal display. The planter should be visible from the beginning of the route without blocking a path that continues left or right. Position it beyond the junction or slightly off-centre when access must continue.
7. Repeat Architectural Planters
Matching square or rectangular containers create rhythm along modern pathways. Use consistent spacing, restrained planting, one dominant foliage form, and materials that relate to nearby paving, fencing, or architecture. Leave deliberate gaps between planters. Too many large containers can create a visual and physical barrier, while repeated units with open space make the path feel longer and more organised.
8. Group Planters at a Bend
A group of three coordinated containers can turn a wide bend into a feature. Place the tallest planter at the back, a medium container beside it, and the lowest planter near the outer edge. Keep the complete group outside the turning line and maintain visibility around the corner. Use plants with compatible light, water, and growing-medium requirements.
9. Use Illuminated Planters
Illuminated containers can mark entrances, steps, bends, or destinations after dark. Select outdoor-rated products and route cables away from water and foot traffic. Solar versions avoid mains cables but require sufficient sunlight. Use soft, controlled light rather than excessive brightness.
Functional Pathway Planter Ideas
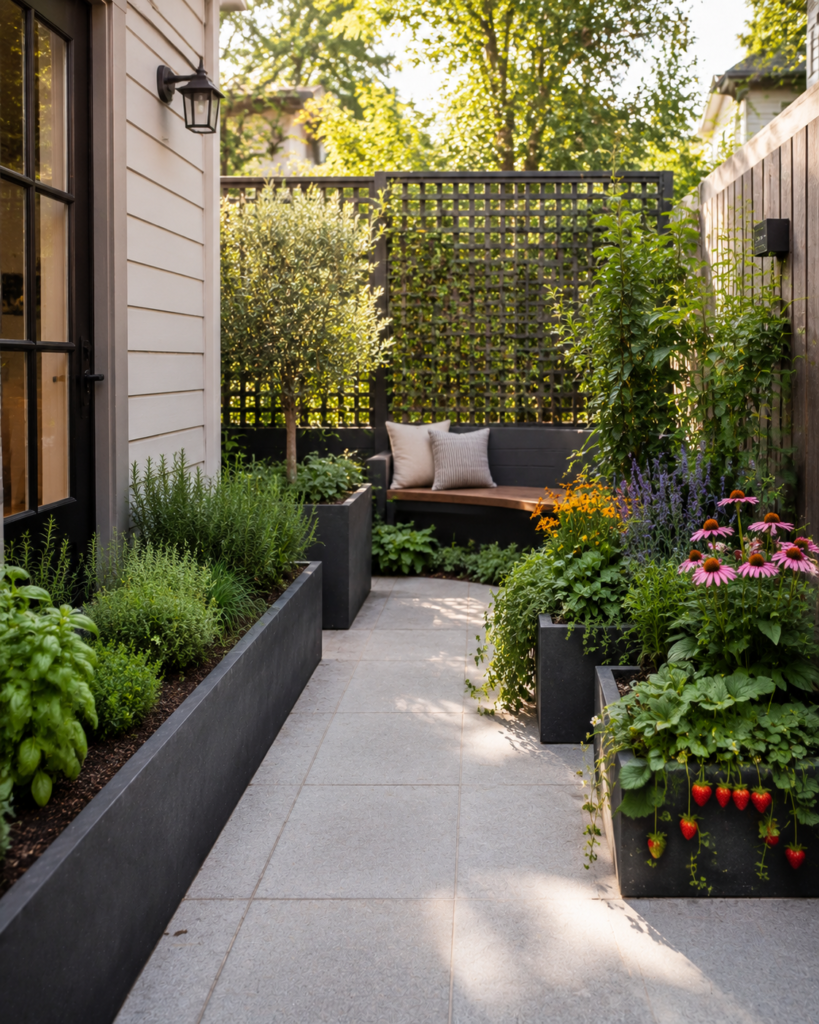
10. Build a Raised Herb Planter
A raised herb trough near the kitchen keeps frequently used ingredients within reach. Select herbs according to sunlight, root depth, water requirements, mature size, and harvesting frequency. Group plants with similar moisture needs, and isolate vigorous spreaders. Keep the trough narrow enough for movement and direct drainage away from the route. Check container herbs regularly because they dry faster than plants in open ground.
11. Add Privacy With a Trellis Planter
Place a trellis planter along the actual unwanted sightline rather than covering the entire path. A partial screen in the correct position may provide better privacy with less lost space. Use a stable base, strong support, sufficient root volume, and a climber suited to regular pruning. Keep gates, steps, lighting, and approaching people visible.
12. Create Pollinator Planters
Use locally appropriate, non-invasive flowering plants with overlapping bloom periods. Position highly active displays away from narrow entrances, children’s play routes, and dining spaces. Avoid broad-spectrum pesticides, maintain water and deadheading, and prune route-facing growth.
13. Grow Strawberries or Salad Crops
Sunny troughs can support strawberries, salad leaves, and compact herbs. Use food-safe materials, clean growing medium, and enough root depth for the selected crop. Keep fruit and leaves off the path, where they can become damaged or slippery. Containers beside warm paving may dry quickly, so check moisture frequently rather than watering on a fixed schedule.
14. Add a Bench Planter
A bench planter combines seating and greenery at a deliberately widened point. Leave room for people to sit, stand, and let others pass. Avoid thorny, heavily shedding, sticky-fruited, or strongly bee-attracting plants immediately beside the seat. Use a level, stable surface and keep the planting accessible for pruning, watering, and cleaning.
Low-Maintenance Pathway Planter Ideas
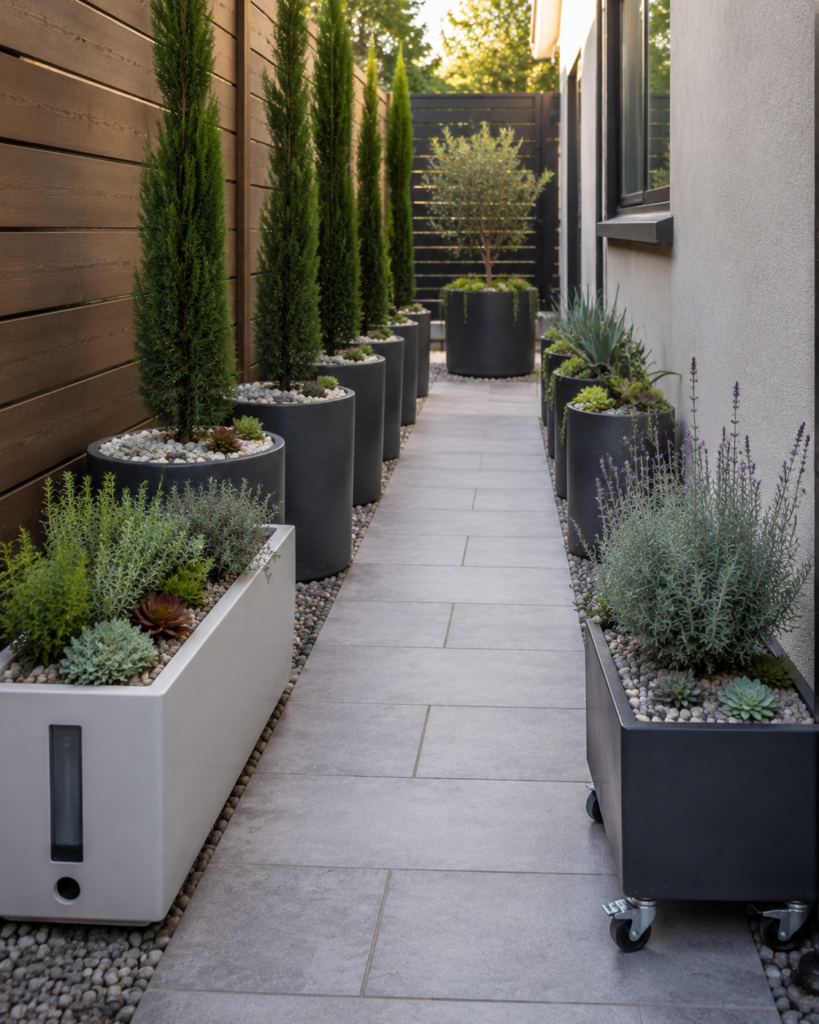
15. Use Self-Watering Planters
Self-watering planters store water in a reservoir and supply moisture through a wick or capillary system. They can reduce rapid drying, repeated surface watering, and runoff. Check reservoir access, overflow position, wick performance, and plant compatibility. Keep the overflow away from the walkway, and remember that self-watering systems still require cleaning and moisture checks.
16. Use Drought-Tolerant Planting
Drought-tolerant plants suit sunny, heat-reflective routes when they are appropriate for the local climate. A decorative gravel surface can reduce splash and create a neat finish, but it does not replace drainage holes or suitable growing medium. Water new plants regularly while roots establish, and avoid assuming that drought tolerance means the container can be ignored.
17. Repeat Evergreen Structure
Evergreen or structurally persistent plants create year-round rhythm and reduce frequent seasonal replacement. Confirm mature width, root volume, pruning needs, frost tolerance, and long-term container suitability before planting. Container roots are more exposed to heat and cold, so seasonal protection may still be necessary.
18. Use Wheeled Seasonal Planters
Wheeled containers can be moved for frost, storms, cleaning, events, or temporary access. Use locking castors rated for the full wet weight, not the empty container. Small wheels may sink into gravel or catch in paving joints, and slopes can make movement unsafe. Test the planted position and wheel locks on the actual surface.
Best Shapes and Materials
Rectangular troughs use narrow linear space efficiently. Tall square containers suit entrances and focal points. Round pots soften wide bends but project farther into movement space. Straight-sided cylinders offer a modern appearance and often better stability than strongly tapered forms. Wall-mounted and trellis planters are strongest where vertical planting is more valuable than floor space.
Material affects weight, heat, moisture, staining, and mobility:
- Terracotta looks natural but dries quickly and may crack in frost.
- Ceramic is decorative but heavy and vulnerable to impact.
- Fibreglass is light, although quality and weather resistance vary.
- Resin is movable but may fade or distort.
- Wood is customisable but needs moisture protection.
- Metal is architectural but may heat up or stain paving.
- Concrete is stable but difficult to reposition.
- Masonry is permanent and requires careful planning.
Choose material according to climate, surface strength, and mobility.
Climate and Plant Selection
Hot, dry paths benefit from larger soil volumes, pale containers, suitable mulch, and locally adapted plants. Humid or rainy routes need open drainage, airflow, controlled foliage, and rot-resistant materials. Frost-prone areas need hardy plants, frost-resistant containers, and clear drainage. Windy paths require broad bases, compact plants, and strong supports. Tropical routes need frequent pruning and reliable runoff control.
Select plants by mature behaviour rather than nursery appearance. Check height, width, root depth, growth rate, light, water, wind tolerance, temperature range, toxicity, invasive status, debris, and pruning needs. Choose upright, compact plants for narrow routes and avoid thorny shrubs, brittle stems, aggressive spreaders, wide grasses, and heavy fruiting plants beside busy walkways.
Arrange Planters Without Blocking Access
Use one-sided linear placement on narrow service routes. Matching pairs work at wide entrances. Repeated planters create rhythm along straight paths. Groups belong at widened bends or junctions, not inside the turning line. One focal container can anchor the end of a route. Wall-mounted layouts preserve floor space, while mixed-height groups should place taller plants furthest from movement.
The route should remain obvious, without weaving around containers, foliage, feet, cables, or runoff.
Pathway Planter Drainage Tips
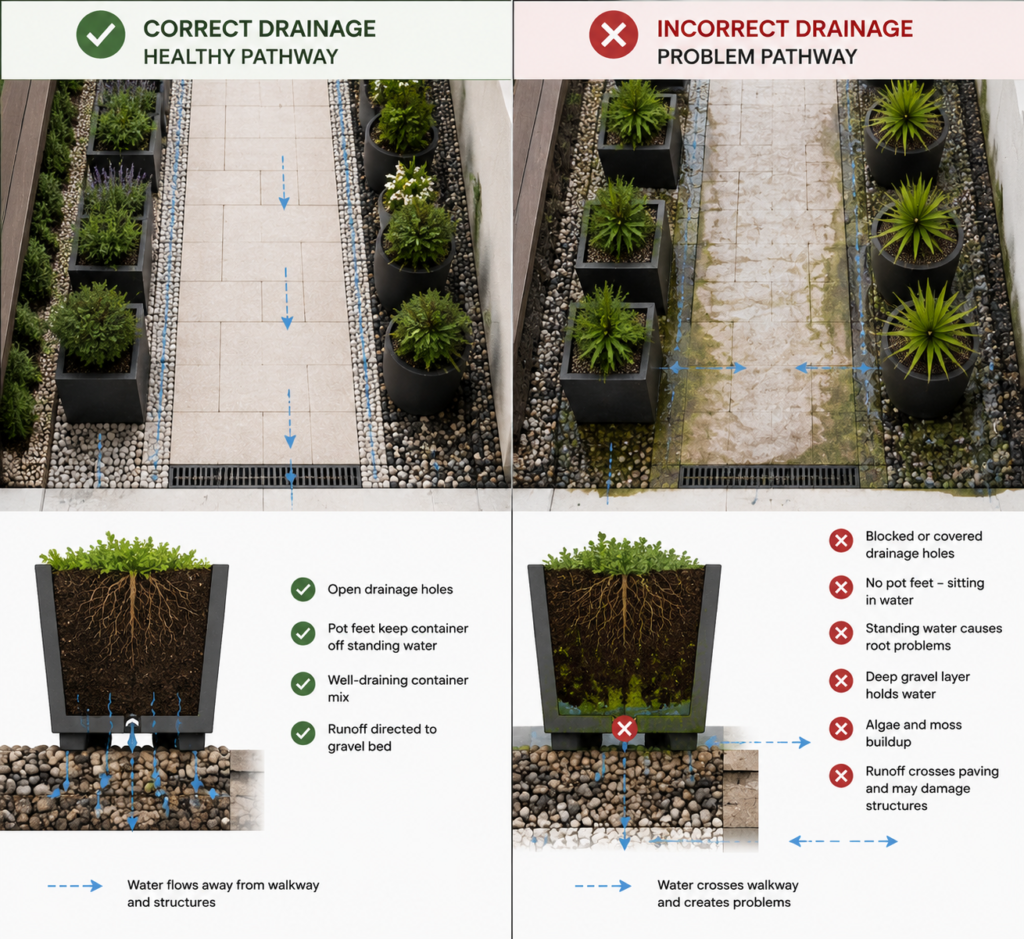
Containers need open drainage so excess water can escape and air can return to the root zone. Use container growing medium rather than dense garden soil, and keep drainage holes clear after repotting, heavy rain, leaf fall, and root growth.
Do not rely on a deep gravel layer at the bottom. It reduces usable root space and does not replace suitable growing medium or open holes. Direct runoff toward a bed, gravel edge, safe drain, or permeable surface. Use saucers carefully and never leave roots standing in water for long periods.
Protect paving and decking with stable, non-marking feet or pads where needed. Check for metal stains, terracotta deposits, trapped moisture, algae, scratches, and concrete discolouration.
Three Practical Layouts
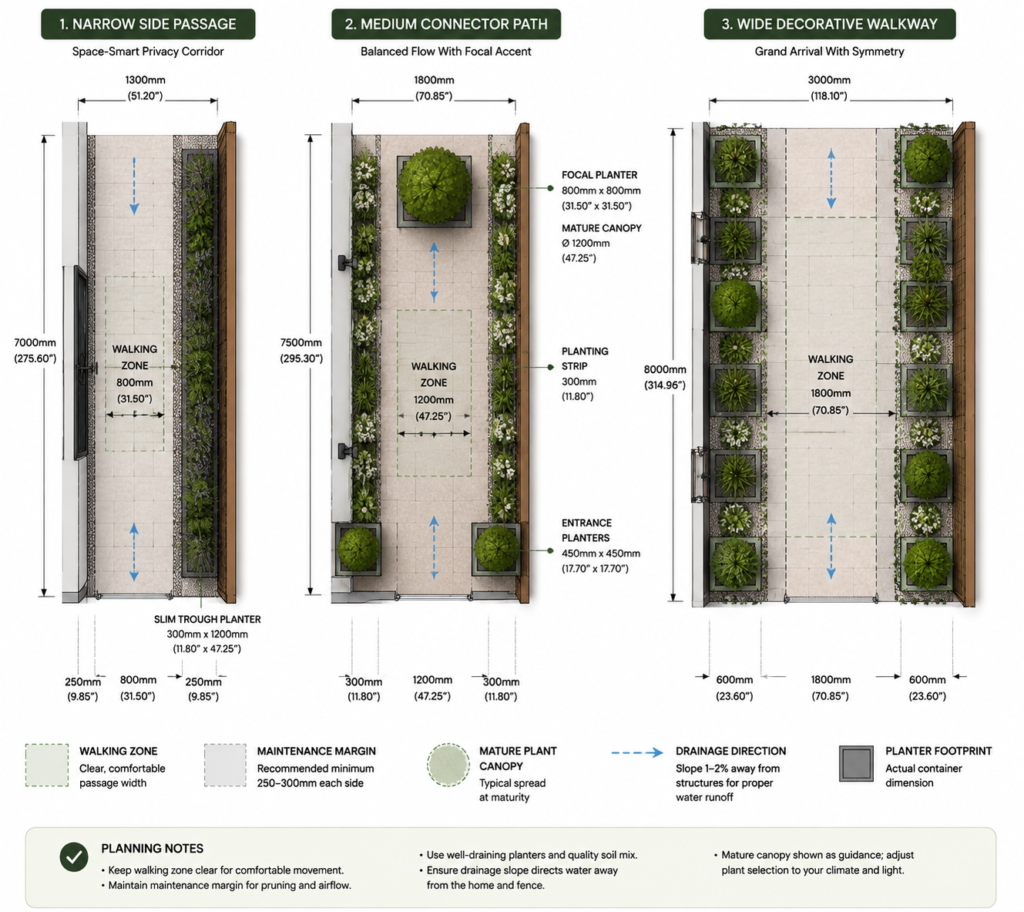
Narrow side passage: For a 1,450-millimetre corridor, preserve about 915 millimetres and use a 250- to 300-millimetre trough with upright plants. Keep utilities open and drainage away from the centre.
Medium connector path: For a 1,900-millimetre corridor, preserve roughly 1,000 to 1,100 millimetres. Use an entrance pair, selected pots along one edge, and a focal planter at the destination.
Wide decorative walk: At 2,500 millimetres or more, coordinated planters may work on both sides. Add a widened feature zone, mixed heights, lighting, or seating while preserving a clear centre.
These are planning examples.
Build or Buy Pathway Planters?
Build when exact dimensions, an unusual corner, a continuous trough, or matching materials solve a real pathway problem. DIY work requires suitable tools, exterior-grade construction, safe drainage, and enough strength for wet growing medium.
Buy when quick installation, consistent finishes, matching units, mobility, self-watering features, or a warranty matter more. Compare external width, base width, internal depth, filled weight, drainage position, overflow, weather resistance, castor rating, and replacement parts. Test one planter before ordering several.
Pathway Planter Mistakes to Avoid
Avoid these common errors:
- Measuring only the empty container.
- Ignoring mature foliage.
- Filling every available gap.
- Blocking gates, doors, or utilities.
- Directing water across the path.
- Using unstable tall planters.
- Choosing thorny or brittle plants.
- Using too many unrelated small pots.
- Combining plants with conflicting needs.
- Positioning heavy containers before testing.
- Forgetting pruning and cleaning access.
- Running lighting cables through the walking line.
- Using dense garden soil.
- Treating self-watering as maintenance-free.
- Copying plant advice without checking local climate.
Final Checklist
Before planting, confirm:
- The complete route and narrowest point are measured.
- Doors and gates open fully.
- Bins, tools, and equipment can pass.
- Mature foliage remains outside the walking zone.
- The surface supports the filled weight.
- The planter is stable.
- Drainage holes remain open.
- Runoff avoids the route.
- Container growing medium is ready.
- The plants suit the light and climate.
- Toxicity and invasive status are checked.
- Watering and pruning access remain open.
- Lighting and irrigation are safely routed.
- The final footprint has been tested.
Backyard Pathway Planter FAQs
What planters work best along a narrow garden path?
Slim troughs, wall-mounted containers, and narrow trellis planters work best. Choose compact upright plants that will not spread into the route.
How wide should a path remain after adding planters?
Keep enough room for people, bins, tools, and mobility equipment. Measure the clear width after including mature foliage.
Can planters sit directly on paving?
Yes, when the surface is level and strong enough. Keep drainage open and use suitable feet or pads where staining may occur.
How far should a planter sit from the edge?
It can sit close when the base is stable and foliage, pot feet, and drainage remain outside the walking zone.
How deep should a pathway planter be?
Depth depends on the plant’s root system. Flowers need less space than shrubs, climbers, or small trees.
Should pathway planters match?
They need not be identical, but repeating one material, colour, shape, or planting style creates a cleaner design.
Can tall planters tip over?
Yes. Use a broad base and consider full wet weight, plant height, and wind exposure.
Are self-watering planters suitable?
Yes, especially on warm routes. Keep overflow away from the path and inspect the reservoir regularly.
Can planters go on both sides?
Yes, when a generous central route remains. One-sided placement is better for narrow functional paths.
Is it better to build or buy?
Build for exact custom dimensions. Buy for speed, matching units, mobility, warranties, or integrated watering features.
How to Build the Display
- Measure the route.
- Identify the narrowest point.
- Mark doors, gates, utilities, and drains.
- Establish the protected walking zone.
- Test footprints with cardboard or tape.
- Include mature foliage.
- Select the planter shape and material.
- Confirm surface weight capacity.
- Plan drainage.
- Observe light, wind, and rainfall.
- Choose locally suitable plants.
- Position heavy planters while empty.
- Install irrigation or lighting safely.
- Fill with container growing medium.
- Plant without overcrowding.
- Water and inspect runoff.
- Walk the route again.
- Adjust before roots establish.
- Monitor seasonal growth.
- Prune before foliage enters the path.
The best backyard pathway planter preserves movement, drains safely, suits the climate, and remains manageable after the plants mature.
Measure the path first, choose the planter second, and select the plants last.

Myra is the founder and lead writer of Backyard Planter Ideas, where she shares practical, well-researched guidance on planter design, plant selection, and outdoor styling. Her goal is to help homeowners create attractive, functional garden spaces with clear, reliable, and easy-to-apply advice.